Flows
Flows
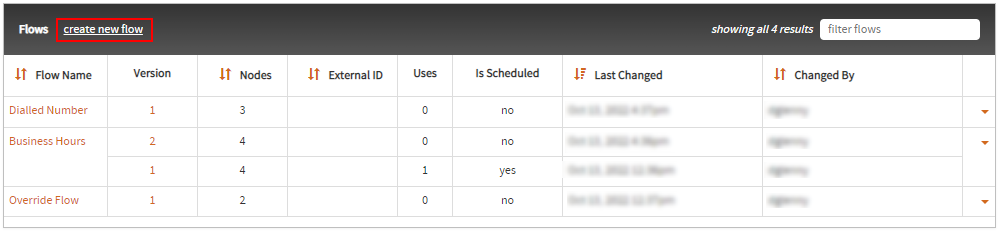
A list of flows owned by the customer is displayed in the Flows section of the Customer screen. The flow table will display up to 10 flows at a time, and the flows may be browsed using the controls shown below the table.
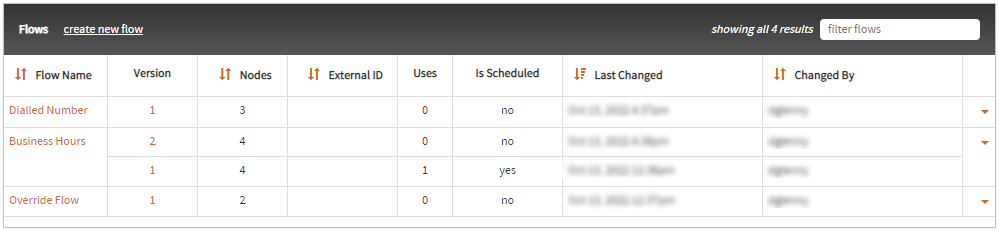
A filter can be applied to the list using the filter field in the top-right of the flow section. This performs a case-insensitive, partial-match search of the flow’s name.
Each flow may have multiple versions stored in the system. Normally only latest version of each flow will be listed in the table. However, older versions of a flow will be displayed if they are active (i.e. active now or will be in the future). If a flow version is not active (i.e. does not have a current or future schedule), and it is not the latest version of a flow, then it will not appear in the Flows table.
View an Existing Flow
There are various ways to view a flow in the flow editor:
- To view the latest version of an existing flow, click the flow name in the left-most column of the flow list.
- To view a specific version of an existing flow, click the flow version of the flow in the Version column.
- If you want to view a version of a flow that is not either (a) the latest, or (b) one explicitly listed in this table, click the flow name to load the latest version, and then in the flow designer use the flow version selection dialog to select the version to view.

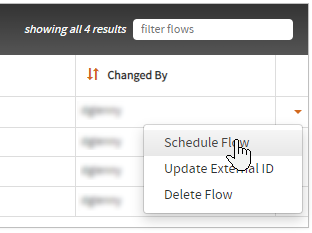
Scheduling a Flow
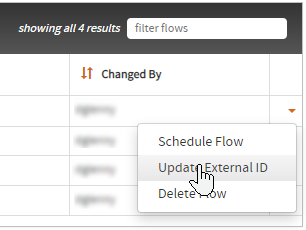
A flow may be scheduled for execution for a service number using the drop-down arrow to the far right of the flow name:
This will a dialog for you to provide the necessary information:
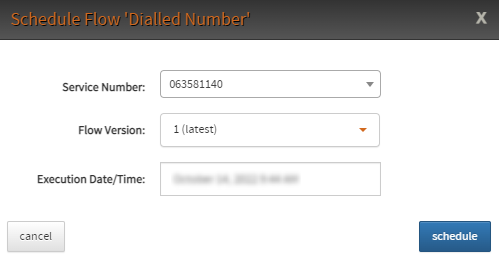
You can select the service number to schedule the flow to by typing the service number in the Service Number
search box. If only one service number is present for your customer, it will be automatically populated.
The Flow Version option allows you to select the version of flow to schedule.
The Execution Date/Time option allows you to define the exact date and time in your currently selected time zone
that the flow should begin to be used by the service number. This will default to the current time, but if clicked
you may specify your own date from a calendar:
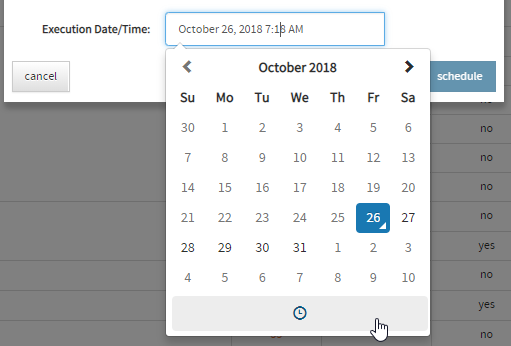
Select the required execution date and then select the clock symbol at the bottom of the calendar to set the required execution time:
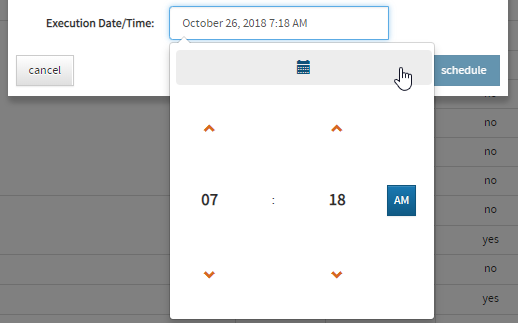
Once saved, the new schedule will be applied to the service and applied automatically at the configured date and time. Note that the seconds are not able to be specified, and will always be treated as 0, i.e. on the minute change.
Creating Flows
To create a new flow, select the create new flow link located in the heading of the Flows section:
This will redirect you to the Flow Editor.
Deleting Flows
Flows can be deleted using the Delete Flow button located in the drop-down menu in the far right column
of the Flows table.
To delete a flow or flows permanently, select the flow versions to delete in the resulting dialog box:
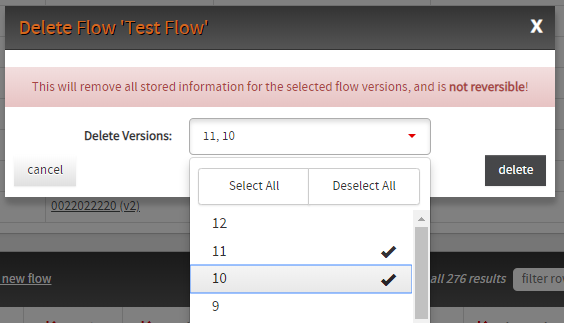
Once the delete button is selected, deletion of the flows will begin immediately.
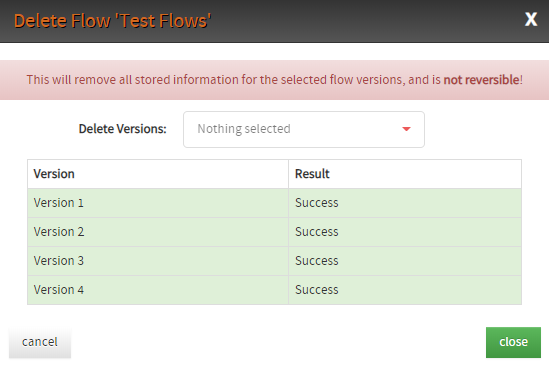
While deleting flows the dialog box will display a table showing the results of each flow deletion.
Successful deletion will be displayed in green with a Success message, and any errored deletions will
display in red with an error message:
External IDs
Flow may be assigned a numeric external ID in order to enable scheduling via self-management (if enabled).
These can be edited by using the drop-down arrow to the far right of the flow name:
External IDs must consist only of digits, and may be removed by simply clearing the current value and saving. Note that external ID values uniquely identify a flow within a customer, and always apply to the latest version of the identified flow.